The Two Best RV Trips for Beginners: Perfect First Weekends That Teach You How Everything Works

The best RV trips for beginners have one thing in common: they are close to home, short in duration, and deliberately chosen to teach you something. Not because beginner trips have to be boring — they do not — but because the first time you connect a water hose in the dark while hungry is not the moment you want to also be three states from home figuring out what a gray tank is.
This guide covers two specific first weekends. One with full hookups — electric, water, and sewer at your campsite — and one without. They are structured differently because they work differently. Together, they cover every fundamental system your RV has. Do one, do both, or pick the one that matches where you are headed. Either way, you come home knowing how your rig actually works.
What Makes the Best RV Trips for Beginners
A shakedown trip is what experienced RVers call a deliberate first outing — a short, low-stakes trip designed to surface problems, packing gaps, and system quirks before you are somewhere remote and committed. The name comes from maritime tradition, and the concept is the same: stress-test the vessel before you take it offshore.
The ideal shakedown trip is within 90 minutes of home. Two nights minimum. One specific campground, booked in advance, with a pull-through site if possible so you do not need to back in on your very first arrival. Everything else flows from there.
If you are still in the decision phase and have not yet pulled the trigger on a rig, our first-time RV buying guide covers what to look for before you commit. And if you are weighing whether to rent before you buy, our guide to RV rental vs. buying breaks down exactly what that decision is worth financially.
Trip 1: The Full Hookup Weekend
What Full Hookups Are and Why They Matter for Beginners
Full hookup means your campsite has three utility connections: electric, fresh water, and sewer. This setup means your RV functions essentially like a stationary home for the weekend — you plug in, connect water, and do not think much about power consumption or tank capacity. For a first trip, that removal of variables is the entire point.
Look for a well-rated RV park or campground within 90 minutes of home that explicitly offers full hookup sites. KOA and Good Sam affiliated parks are widely available and generally well-maintained with clear site numbering and staff on hand. Book two nights and request a pull-through site when you reserve.
Before You Leave: A Few Things to Confirm
Check that your rig is road-ready before departure — tires, hitch connection if you are towing, and all exterior bays latched. Make sure you have your basic kit: a fresh water hose rated for drinking water, a water pressure regulator, a sewer hose kit with elbow fitting, a surge protector, and leveling blocks and wheel chocks if your rig does not have an automatic leveling system. Our RV maintenance checklist covers what to inspect before any trip.
Friday: The Drive and Arrival
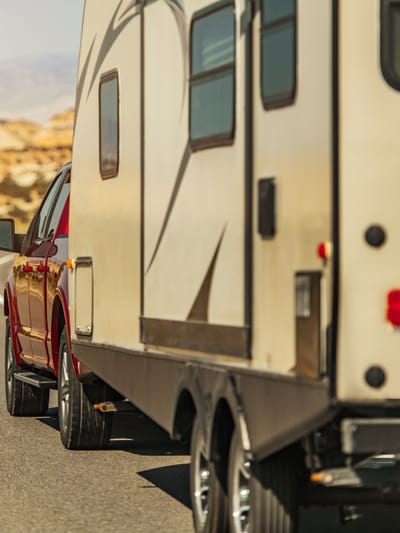
Keep the drive under 90 minutes. This is not about scenery — it is about learning how a larger vehicle handles before you are tired from a long day. RVs take wider turns than cars, especially when towing a trailer. Your rear tracks differently than your front. Give yourself more space than feels necessary in turns and you will have exactly enough.
Know your rig's height before you leave — write it on a sticky note and put it on the dashboard. Most RVs run between 10 and 13 feet tall. Gas station canopies, drive-throughs, and some campground entrance roads can run as low as 10 feet. When in doubt, stop and check.
Plan fuel stops at truck stops rather than standard gas stations. Love's, Pilot, and TA Travel Centers have pull-through fueling lanes built for large vehicles. Standard stations with tight canopies and cramped layouts are avoidable stress on day one.
If you are towing a trailer for the first time, our guide to towing a travel trailer covers the driving mechanics and setup specifics that first-timers most often miss.
When you arrive, check in at the office before pulling to your site. Staff can tell you which direction to approach your specific site, whether it is level, and if there are any tight turns to be aware of.
Friday Night: Setting Up Camp
Pull into your site and take a moment before you do anything else. Look at the full footprint: do you have enough clearance on both sides to extend your slide-outs? Is there room in front of or behind the rig to park your tow vehicle once you detach? Are the utility hookups — power pedestal, water spigot, and sewer inlet — close enough that your hoses and cords will reach comfortably? Confirm all of this before you commit to your exact position. A small adjustment now is much easier than moving a partially set-up rig.
For a checklist-based walkthrough of the arrival process specifically, our RV setup checklist goes step by step from pull-in to settled.
Once you are positioned correctly, set up in this order:
1. Level the rig. An unlevel RV affects how your refrigerator runs, how you sleep, and how comfortable everything feels inside. Use leveling blocks under the tires to raise the low side, or use your rig's built-in leveling system. A small bubble level on the counter tells you when you are close enough — most RV refrigerators need to be within about 3 degrees of level to operate efficiently.
2. Wheel chocks. Place wheel chocks — wedge-shaped blocks that brace against your tires — before you do anything else that requires you to be under or around the rig. Chocks prevent the rig from rolling while you work.
3. Detach from your tow vehicle if you are pulling a trailer. Crank the tongue jack up high enough to clear the ball hitch, disconnect the safety chains, brake controller plug, and hitch ball, then move the truck forward and park it. Lower the tongue jack back down from the raised unhitch position, then recheck your level front to back — the front was raised to clear the ball, so level needs to be confirmed again now that the trailer is sitting at its true resting height. Adjust if needed before continuing.
4. Lower stabilizer jacks. Stabilizer jacks at the corners reduce movement inside the rig once you are level. They do not lift or level — they just reduce sway. Crank them down until they contact the ground firmly, then a quarter turn more.
5. Extend slide-outs if your rig has them, now that you are level, stable, and clear of the tow vehicle.
6. Connect shore power. Plug your surge protector into the campground pedestal, then plug your RV's power cord into the surge protector. A surge protector monitors incoming voltage and cuts power before a spike can damage your RV's electrical system — older campground pedestals in particular can have inconsistent power. Our article on RV shore power hookup mistakes covers exactly what can go wrong and how to avoid it.
7. Connect fresh water. Attach your water pressure regulator to the campground spigot first, then connect your fresh water hose between the regulator and your RV's city water inlet. A water pressure regulator limits incoming pressure to a safe range — typically 40 to 50 PSI — protecting your RV's plumbing from campground supplies that can run as high as 80 PSI. Turn the spigot on and check for leaks at both connection points.
8. Connect sewer. Run your sewer hose from the RV's waste outlet to the campground sewer inlet. A quality sewer hose kit includes an elbow fitting that angles cleanly into the ground inlet. Keep both the black tank valve (toilet waste) and the gray tank valve (sinks and shower) closed for now — you are not dumping yet, just connected and ready.
9. Turn on the water heater. Whether yours runs on propane or electric, switch it on now so you have hot water by the time you want it. Give it 20 to 30 minutes.
10. Turn on a faucet and confirm water is flowing. Check under the sink for any drips. Run the shower briefly. If pressure feels inconsistent or you see a leak, trace it back to your connections before settling in.
Cook something simple for dinner — one pan, minimal dishes — and get to know the kitchen without pressure. Sit outside. Sleep.
Every campsite connection, in the right order, every time. Subscribe to our weekly newsletter.
EVERY SYSTEM, EVERY SCENARIO, EVERY WEDNESDAY — FREE.
Saturday: Tinker, Observe, and Actually Relax
Saturday has no agenda. This is the day you live in the rig and pay loose attention to how it all works.
Walk the campground and look at how other people have set up their sites. Notice how they have arranged their outdoor furniture, how they have run their cords and hoses, whether they have outdoor rugs or awnings or lights. Other campers' setups are one of the best free education resources in RVing, and most people are happy to talk about their gear if you ask.
Figure out your roles if you are camping with a partner or family. Who handles connections? Who monitors tanks? Who is in charge of the outdoor setup? On a first trip these things are unassigned and slightly chaotic, and Saturday is the low-stakes day to sort them out rather than negotiating in the rain at a backed-in site somewhere unfamiliar.
Poke around your own rig. Open storage bays and see what is where. Find the water heater access panel, the battery compartment, the propane tank shutoff. Know where things are before you need them. Check your electrical panel and see what breakers correspond to what — run the AC for a few minutes, the microwave, the furnace. Note what can run simultaneously on your connection without tripping anything.
Take a walk outside the campground if the area allows it. Have lunch without worrying about it. Cook a real dinner in the evening and notice what the kitchen is missing and what works better than you expected.
By the end of Saturday you will have a mental list of things you want to add, adjust, or bring differently next time. That list is one of the most useful things you take home.
Sunday Morning: Breaking Camp
Break camp in reverse order of how you set up.
Retract slide-outs first. Then dump your tanks: open the black tank valve and let it drain fully, then close it. Open the gray tank valve — the accumulated sink and shower water flushes the sewer hose clean as it drains. While the gray valve is still open, rinse the sewer hose with your flush-out hose so the rinse water drains cleanly through. Then close the gray valve and disconnect the sewer hose.
Our guide to RV plumbing and what your three tanks actually do is worth a read before Trip 2 if the tank management piece is still fuzzy.
Disconnect the fresh water hose and let it drain before coiling it. Unplug shore power from the pedestal, then from the RV. Crank up the stabilizer jacks.
Hitch the tow vehicle back up if you are towing — safety chains, brake plug, pin and clip, all of it. Then walk the entire exterior before you move an inch. Confirm nothing is still connected, nothing is still extended, no gear is on the ground. Check interior cabinet latches and the stovetop. Then pull forward and head home.
You now know how to connect, run, and disconnect a fully hooked-up RV. That is the foundation of most RV camping in the US.
Trip 2: The No-Hookup Weekend
What No-Hookup Camping Actually Means
Camping without hookups — often called dry camping — means your campsite has no electric, water, or sewer connections. Your RV runs entirely on what it carries: battery power, fresh water in the onboard tank, and holding tank capacity for waste. State park campgrounds, national forest sites, and Bureau of Land Management land frequently fall into this category. So do many state park sites that offer only electric, with no water or sewer at the site.
This is not harder than full hookup camping. It is a different set of variables to manage. Learning to manage them on a short first trip — close to home, two nights — means you understand your rig's actual capacity before you are counting on it somewhere remote.
Find a state park campground within 90 minutes of home. State parks tend to have well-spaced, clearly numbered sites, dump stations on property, and reliable cell service in most regions. Book two nights.
Before You Leave: Fill the Fresh Water Tank
Your RV has a fresh water tank — a built-in onboard tank that holds potable water for use when you are not connected to a campground water supply. Most tanks range from 30 to 100 gallons depending on rig size. Fill it at home before departure using a drinking water safe hose — standard garden hoses are not rated for potable water and can affect taste. A dedicated drinking water hose is worth keeping separate and labeled for this use only.
Once full, switch your water system to draw from the tank rather than city water. Your onboard water pump — an electric pump that pressurizes water from the tank through your faucets — will activate briefly each time you open a tap. The sound is normal.
A battery monitor is useful on this trip — a device that shows your current battery state of charge and power draw so you are not guessing. Check it periodically throughout the weekend to develop a feel for what your daily usage actually looks like.
Friday: Arrival and Setup Without Hookups
The drive is identical to Trip 1. Same rules: know your height, plan fuel stops at truck stops, arrive before dark, check in first.
When you pull into your site, do the same assessment as Trip 1: room for slide-outs on both sides, room for the tow vehicle, nothing that will block you in. Without hookups you are not checking hose reach, but you are still confirming the site is usable before committing to your position.
Setup without hookups is faster: level the rig, set wheel chocks, crank the tongue jack up to clear the ball and detach the truck, lower the tongue jack back down, recheck level front to back, then lower stabilizer jacks and extend slide-outs.
Turn your refrigerator to propane mode. Turn on the water heater — propane water heaters are standard on most rigs and heat water quickly. Check that your propane tanks are open and the fridge is cooling. Confirm water flows at the tap from the onboard tank.
Cook dinner on the propane stove and get settled.
Saturday: Managing Water and Power, and Everything Else
The same spirit as Trip 1 Saturday applies here — tinker, observe, and relax — with the addition of paying attention to your finite resources.
Water: The habits that matter most are turning off the tap while soaping dishes, taking short showers, and not running water the way you would at home. Most fresh water tanks hold enough for two people over two nights with moderate use. Watch your tank monitor panel — usually located near the entry — and note where gray tank levels are climbing. Every drop of water that goes down a drain goes into the gray tank. Do not let it reach full before Sunday morning.
Power: Your house batteries charge while you drive and discharge as you use lights, the water pump, and the furnace fan. What drains batteries faster than people expect is leaving interior lights on all evening and charging multiple devices continuously. Check your battery monitor periodically. You are not managing a crisis — you are building awareness of what your daily usage actually looks like, which is useful information for every trip that follows.
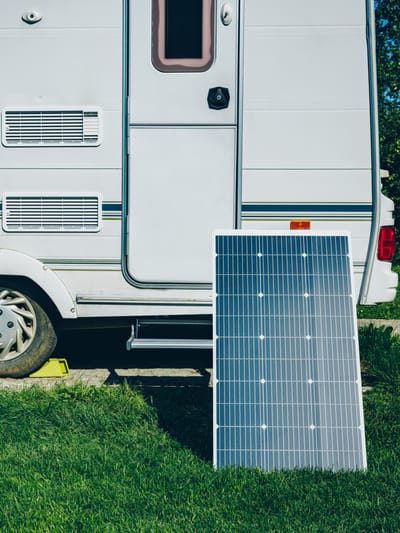
For anyone interested in extending dry camping capability with a solar setup, our guide to building an RV solar setup on any budget covers everything from entry-level panels to full off-grid systems. And if battery issues are something you want to understand more deeply before Trip 2, our breakdown of why RV batteries keep dying and how to fix it is worth a read.
Walk the campground. Notice other setups. Figure out your roles. Make a real dinner. The shakedown trip lesson is the same with or without hookups: you are learning what the rig needs and what you need inside it.
Sunday Morning: Driving to the Dump Station
Without a sewer connection at your site, you drive to the campground's dump station rather than connecting a hose at the site. The process is the same — black tank first, gray tank second — but you pull forward to the dump station port rather than working at your campsite.
Open the black tank valve and let it drain fully, then close it. Open the gray tank valve and let it drain. While the gray valve is still open, rinse the sewer hose with the dump station's rinse water so it drains cleanly through. Then close the gray valve and disconnect the hose.
Keep a dedicated rinse hose separate from your drinking water hose and never mix them up.
Hitch up, walk the exterior, confirm everything is stowed and latched, and head home.
You now know how your RV runs on its own — batteries, propane, onboard water, holding tanks. That combination is what every off-grid and state park trip depends on, and you understand it from a weekend of real, low-stakes experience.
What You Walk Away Knowing
After one or both of these trips, you have covered every core system in your rig:
- Shore power connection and surge protection
- Fresh water hookup and pressure regulation
- Sewer connection and tank dumping — at-site and at a dump station
- Onboard water tank use and the water pump
- Battery management and power conservation
- Propane systems for heat, cooking, and refrigeration
- Campsite leveling, wheel chocks, and stabilizing
- Slide-out operation and site assessment
- Detaching and reattaching a tow vehicle at camp
- RV driving basics on the way there and back
More usefully, you come home with a specific list of what you would do differently next time — what to add, what to leave behind, what needs a better system. Every experienced RVer has that list after every trip. Starting to build yours is the whole point.
For a look at where to go once the shakedown weekends are behind you, our guide to what you need to know before your first RV trip out west covers how to think about longer routes before you commit to one. And if you want to go deeper on managing life off the grid, our complete guide to boondocking without hookups picks up right where Trip 2 leaves off.
FAQs
What are the best RV trips for beginners?
The best first RV trips are two nights, within 90 minutes of home, and chosen to teach you how your rig works rather than to reach a specific destination. A full hookup campground trip teaches you shore power, water connection, and sewer dumping. A no-hookup state park trip teaches you battery management, onboard water use, and propane systems. Doing both in sequence covers every fundamental system your RV has.
What is a shakedown trip in RVing?
A shakedown trip is a deliberate first outing close to home — typically within 90 minutes — designed to surface mechanical issues, packing gaps, and system unfamiliarity before a longer or more remote trip. The goal is low stakes: if something goes wrong or you forget something, help and home are close.
What is the difference between full hookup and dry camping in an RV?
Full hookup camping means your campsite has electric, fresh water, and sewer connections — your RV functions like a home plugged into utilities. Dry camping means no external connections. Your RV runs on house batteries, onboard fresh water, propane, and holding tanks for waste. Both are standard RV camping scenarios; beginners benefit from trying each on a short trip before committing to either on a longer journey.
What is the correct order to set up an RV at a campsite?
Level the rig first, then set wheel chocks, raise the tongue jack to clear the ball and detach the tow vehicle, lower the tongue jack back down and recheck level, lower stabilizer jacks, extend slide-outs, then connect shore power, fresh water, and sewer in that order. Turn on the water heater once water is connected so it has time to heat before you need it.
What does a water pressure regulator do on an RV?
A water pressure regulator attaches between the campground water spigot and your fresh water hose. It limits incoming pressure to a safe range — typically 40 to 50 PSI — to protect your RV's plumbing from campground supplies that can run as high as 80 PSI. Without it, sustained high pressure can stress fittings and connections over time.
How do you dump RV tanks for the first time?
Always dump the black tank — toilet waste — first. Open the valve, let it drain fully, then close it. Open the gray tank — sink and shower water — second and let it drain. While the gray valve is still open, rinse the sewer hose so the rinse water drains cleanly through. Then close the gray valve and disconnect the hose. At a full hookup site you do this at your campsite. At a no-hookup site you drive to the campground's dump station and follow the same sequence there.
Do I need a generator for no-hookup RV camping?
Not for a first trip. Most RV house battery banks hold enough charge for two nights of lighting, water pump use, and furnace fan operation. What depletes batteries faster than expected is leaving lights on through the evening and charging multiple devices continuously. A portable solar generator is a practical addition for regular no-hookup camping but is not required for a first shakedown weekend.



Categories
Related Posts

Subscribe to the Swervia Newsletter
The best RV stories, tips, and destinations—expertly curated and always free.