RV Maintenance: What to Do, When to Do It, and What It Costs
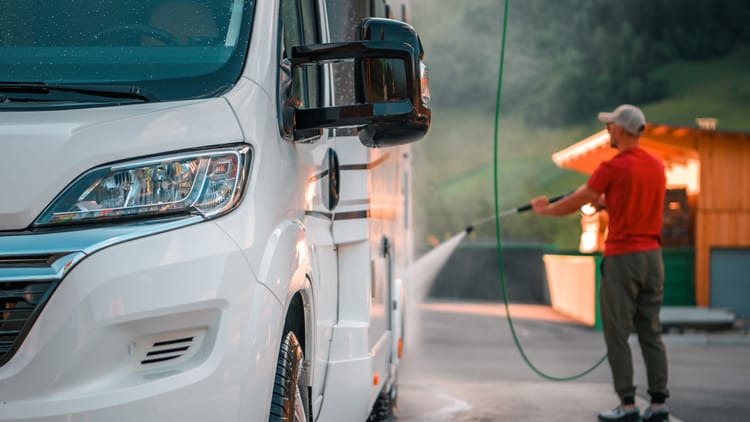
RV maintenance is the least glamorous part of owning an RV and the part that quietly decides how much of the fun you actually get to have. Nobody buys a travel trailer dreaming about grease guns and sealant tubes. Everybody remembers the trip that ended on the shoulder with a tow bill longer than the campground receipt.
Here's the encouraging part: most of it isn't hard. RV maintenance is a scheduling problem far more than a mechanical one. Stay on the intervals and a twenty-year-old trailer will outlast a neglected three-year-old coach. Skip them and small, cheap problems compound into structural, expensive ones, usually somewhere with no cell service.
Whether you're in a compact Class B van or a diesel pusher longer than some city apartments, the systems are the same and so is the arithmetic. The jobs below run from the five-minute walkaround before you pull out of the driveway to the annual work worth handing to a professional, sorted by how often each one comes due.
Understanding Your RV Maintenance Schedule
Think of RV maintenance like a fitness routine — consistency beats intensity every time. Some tasks need to be taken into consideration monthly, while others can wait for seasonal care intervals. The key is knowing which is which and actually sticking to the schedule.
Your maintenance timeline breaks down into four main categories: pre-trip inspections (every departure), monthly check-ups, seasonal care transitions, and annual deep dives. Each serves a different purpose, from catching small issues before they become road hazards to preparing your RV for storage or extreme weather conditions.
The reality is that RV maintenance isn't optional — it's an investment in your safety, your wallet, and your sanity. A well-maintained RV holds its value better, breaks down less frequently, and gives you the confidence to explore farther from home without wondering if today's the day something major fails. If you're also thinking through the full financial picture of life on the road, our breakdown of what full-time RV living actually costs puts maintenance spending in the broader context of your annual RV budget.
Pre-Trip RV Maintenance Checks
Before you even think about hitting the road, walk around your RV with purpose. Check your headlights, brake lights, turn indicators, reverse lights, and the license plate light — and yes, have someone help you by walking around while you test each function. It's easier than explaining to a state trooper why your brake lights decided to take a vacation.
Start with your tires, which are literally where the rubber meets the road. Check the air pressure when tires are cold, inspect for uneven wear patterns, cracks, or bulges, and don't forget your spare. RV tire costs range from $100 to $300 per tire, so catching problems early prevents expensive replacements at inconvenient times.
Your RV's fluid levels deserve the same attention you'd give your daily driver. Check engine oil, coolant, brake fluid, and transmission fluid if you're in a motorhome. For towable RVs, inspect the hitch connection, safety chains, and electrical connections. A loose hitch pin isn't just dangerous — it's the kind of mistake that makes for very bad camping stories. Our guide on towing a travel trailer for the first time covers hitch setup and safety chain rigging in detail if you're newer to towing.
Don't overlook the interior safety checks either. Secure all loose items, ensure cabinet doors latch properly, and test your smoke and carbon monoxide detectors. Make sure that any interior cabinets are both closed and locked to prevent items from falling during the trip. Nobody wants their dinner plates becoming projectiles on the first sharp turn.
Monthly RV Maintenance Tasks
Monthly maintenance is where you catch the small stuff before it becomes the big stuff. Check all the seals around windows, doors, skylights, HVAC systems and others because water damage is the silent killer of RV values. A $10 tube of sealant now can prevent thousands in repair costs later.
Your RV's exterior needs regular attention, especially if you're dealing with different climates. Inspect the roof for soft spots, cracks, or areas where sealant has failed. Pay close attention to seams, vents, and skylights since these are common failure points where water likes to sneak in.
Inside your RV, test all appliances monthly, even if you haven't used them recently. Run the generator under load, cycle the refrigerator between gas and electric, and check that your water pump maintains pressure. Test your slideouts if you have them — they should move smoothly without unusual noises or binding.
Battery maintenance varies depending on your setup, but all batteries need regular attention. Check water levels in flooded lead-acid batteries, clean terminals, and test the charging system. A battery monitor takes the guesswork out of this entirely — it gives you real-time voltage, state of charge, and alerts before a battery problem sidelines your trip. If you're running lithium batteries, monitor the battery management system and ensure your charging sources are compatible. For a deeper dive into why RV batteries fail and how to prevent it, our guide to RV battery problems covers the most common culprits and their fixes.
SWERVIA RV MAINTENANCE GUIDE
GET THE COMPREHENSIVE RV MAINTENANCE GUIDE HERE
Seasonal RV Maintenance and Weather Prep
Seasonal care is where RV maintenance gets serious about protecting your investment. As temperatures change, your RV expands and contracts, potentially affecting seals, plumbing, and electrical connections. This is also when you'll switch between winterization and dewinterization procedures.
Winter preparation involves more than just protecting your plumbing from freezing. It costs anywhere from $130 to $170 for a basic winterizing package at an RV dealer, but many owners learn to do it themselves. The process includes draining all water lines, adding antifreeze to traps, and preparing the exterior for harsh weather.
Spring dewinterization reverses the winter prep process, but it's also prime time for a thorough inspection after months of storage. It will cost from $75 to $200 to have it done professionally, though the DIY approach is more straightforward than winterization.
Summer preparation focuses on cooling systems, tire pressure changes due to heat, and ensuring your air conditioning can handle the load. Check refrigerator operation in hot weather, inspect awning fabric for UV damage, and verify that your generator cooling system is clean and functional.
Fall maintenance prepares your RV for storage or continued use in cooler weather. This includes changing engine oil before storage, treating fuel systems, and doing a comprehensive inspection of all systems before either putting the RV away or continuing to use it through winter. If you're planning to stay on the road through shoulder season and beyond, our complete boondocking guide walks through the power and water management strategies that matter most when you're not plugged in.
Engine and Mechanical Maintenance for Motorhomes
For motorhomes, engine maintenance follows automotive principles but with RV-specific considerations. Oil changes should happen more frequently than your car due to the harder service conditions — think mountain passes with a house strapped to your back. Most manufacturers recommend oil changes every 3,000–5,000 miles or at least annually, whichever comes first.
Your RV's transmission works harder than a car's, especially if you're towing a vehicle behind a motorhome or pulling a heavy trailer. Check fluid levels regularly and don't ignore unusual shifting patterns or noises. Transmission repairs on RVs are expensive and often require specialized shops.
Cooling systems deserve special attention because RV engines often work harder and have less airflow than passenger cars. Check coolant levels, inspect hoses for bulges or cracks, and ensure the radiator fins aren't clogged with bugs, leaves, or road debris. Overheating is one of the fastest ways to turn a vacation into an expensive nightmare. Our guide on highways that are hardest on RVs is worth reading before any mountain route, particularly if your cooling system is anything less than fresh.
Don't forget about chassis lubrication points, especially on larger motorhomes. Ball joints, tie rod ends, and suspension components need regular greasing. Many RV owners overlook this until components start wearing prematurely or making noise.
Wheel Bearing Maintenance: Critical but Often Overlooked
For towable RVs, wheel bearing maintenance is absolutely critical for safe travel. These bearings support thousands of pounds while spinning at highway speeds, and bearing failure can cause wheels to lock up, catch fire, or even separate from your trailer — a nightmare scenario nobody wants to experience.
Wheel bearings should be repacked with fresh grease every 12 months or 12,000 miles, whichever comes first. If you're a light user who only travels 2,000–3,000 miles per year, annual service is still recommended because grease can break down from heat cycling and contamination even when not in use. For smaller trailers with faster-spinning wheels, consider more frequent service intervals.
The repacking process involves removing the wheels, pulling the hubs, cleaning out old grease, inspecting bearings and races for wear, and repacking with fresh bearing grease. This isn't a job for everyone — it requires proper tools, a clean workspace, and attention to detail. Many RV owners have this done professionally for $150–250 per axle, considering it cheap insurance against catastrophic failure.
Plumbing and Water Systems
RV plumbing systems are more complex than they appear, with components that rarely exist in residential applications. Your fresh water system includes the tank, pump, accumulator tank, and distribution lines, all of which need regular attention to prevent failures and contamination. If you're still getting familiar with how those three tanks actually work together, our RV plumbing 101 guide breaks the whole system down without the plumber jargon.
Start with your fresh water tank, which should be sanitized at least twice yearly or whenever you detect odors or taste issues. Use a bleach solution specifically designed for potable water systems, and don't forget to sanitize the hot water tank and all distribution lines. The process takes a few hours but prevents health issues and system damage.
Your gray and black water systems need different care approaches. Gray water tanks collect relatively clean wastewater from sinks and showers, but they can still develop odors and clogs. Black water tanks require more aggressive treatment with appropriate chemicals and thorough flushing to prevent sensor failures and odor problems.
Water pump maintenance involves checking for proper pressure, unusual cycling, and leaks in the system. A pump that cycles frequently often indicates a leak somewhere in the system or a failing accumulator tank. Address these issues promptly since they can damage the pump and waste precious fresh water when boondocking.
Don't forget to drain your water heater before winter storage or when temperatures might drop below freezing. Most water heaters have a drain plug on the exterior that allows you to empty the tank completely. Failing to drain the water heater can result in a cracked tank that's expensive to replace and creates a mess inside your RV.
Electrical Systems and Battery Care
RV electrical systems are more complex than most owners realize, often featuring 12V DC, 120V AC, and sometimes 240V systems all in one unit. Understanding and maintaining these systems properly ensures reliable power for your adventures and prevents dangerous situations.
Your house batteries are the heart of your 12V system, powering lights, water pumps, and control circuits even when you're not connected to shore power. Battery maintenance varies by type — flooded lead-acid batteries need regular water additions and equalization charges, while AGM and lithium batteries have different requirements but generally need less hands-on maintenance.
The charging system includes your converter/charger, solar panels if equipped, and alternator charging from the engine. Each component should be tested periodically to ensure proper voltage output and current regulation. Overcharging damages batteries while undercharging leaves you with insufficient power when you need it most. If you're considering adding solar to reduce your reliance on shore power and extend the life of your charging system, our guide to building an RV solar setup on any budget walks through sizing and component selection from starter systems to full off-grid builds.
Inverter systems that convert 12V DC to 120V AC power require proper ventilation and periodic inspection of connections. These units generate heat and can be damaged by poor ventilation or loose connections that create resistance and heat buildup.
One protection item worth having from day one: a surge protector rated for your RV's amperage installed at every shore power hookup. Campground pedestals vary widely in power quality, and a voltage spike can damage your converter, appliances, and shore power inlet in seconds. For a walkthrough of everything that can go wrong at the pedestal and how to avoid it, our RV shore power hookup guide covers the most common mistakes and how to prevent them.
Exterior Maintenance and Protection
Your RV's exterior takes a beating from sun, rain, road salt, and general exposure. Regular washing isn't just about appearance — it's about protecting your investment from UV damage, corrosion, and deterioration that can affect both function and resale value.
Roof maintenance is critical since most RV roofs are relatively flat and prone to water pooling. Carefully examine the entire roof surface for cracks, tears, or soft spots during your inspections. Different roof materials require different care approaches, from rubber membrane roofs that need specific cleaners to fiberglass roofs that can handle more aggressive cleaning.
Exterior seals around windows, doors, and penetrations need regular inspection and maintenance. Inspect the caulking and weather stripping for cracks or deterioration and address issues before they allow water intrusion. Use appropriate sealants for each application — what works on a window may not be suitable for a roof vent.
Slideout maintenance includes both the mechanical components and the seals that keep weather out when extended. Clean and lubricate slide mechanisms according to manufacturer specifications, and inspect the seals for damage or contamination that could affect their sealing ability.
Keeping Critters Out During Storage
Nothing ruins the start of camping season like discovering mice have turned your RV into their winter vacation home. Preventing rodent intrusion requires sealing entry points and removing attractions that draw them inside.
Start by walking around your RV with steel wool and expanding foam, sealing any openings larger than a quarter-inch. Pay special attention to areas where plumbing, electrical, or propane lines enter the RV. Mice can squeeze through surprisingly small openings, so be thorough in your inspection.
Remove all food items, including pet food, before storage. Clean thoroughly to eliminate crumbs and food odors that attract rodents. Some owners place dryer sheets, peppermint oil-soaked cotton balls, or commercial rodent repellents throughout the RV, though sealing entry points is more effective than repellents alone.
Check and maintain these barriers regularly, as damage from weather or animals can create new entry points.
Interior Systems and Appliances
RV appliances work harder than their residential counterparts, often switching between different power sources and dealing with movement and vibration that home appliances never experience. Regular maintenance keeps them working reliably and efficiently.
Your RV refrigerator, whether absorption or residential-style, needs different care than a home unit. Absorption refrigerators require level parking for proper operation and periodic cleaning of the cooling unit exterior. Residential refrigerators need adequate ventilation and may require inverter power when not connected to shore power.
Furnace and air conditioning systems need regular filter changes and inspection of ductwork for leaks or damage. Many RV HVAC issues stem from dirty filters or blocked vents rather than equipment failures. Keep spare filters on hand and check them monthly during heavy use periods.
Water heater maintenance includes annual anode rod replacement for tank-type units and regular flushing to remove sediment buildup. Tankless water heaters need different maintenance, typically involving descaling in hard water areas and regular inspection of venting systems.
Tire Care and Safety
RV tires carry more weight and often sit unused for longer periods than car tires, creating unique maintenance requirements. Proper tire care prevents blowouts, improves fuel economy, and ensures safe handling in all driving conditions.
Check tire pressure weekly when traveling and monthly when stored, always when tires are cold. RV tires typically run higher pressures than car tires, and proper inflation is critical for load-carrying capacity and tire longevity. Under-inflation generates heat that can lead to catastrophic failure. A solar-powered tire pressure monitoring system that alerts you in real time while driving is one of the higher-value safety upgrades you can make to any RV or tow setup.
Inspect tires for uneven wear patterns that indicate alignment issues, overloading, or improper inflation. Look for cracks in the sidewalls, especially on older tires that may have sat in one position for extended periods. Age is as important as tread depth for RV tires — most manufacturers recommend replacement after 6–7 years regardless of tread depth.
Don't forget your spare tire, which should be inspected regularly and kept at proper pressure. Know where your jack and lug wrench are located, and consider upgrading to better equipment if the factory-supplied tools seem inadequate for roadside changes.
Most RV tires should be replaced every 10,000 to 15,000 miles for smaller RVs, with larger motorhomes potentially reaching 30,000 miles. However, age is often more important than mileage for RV owners since most RVers only travel 5,000 miles per year. Replace tires that are 6 years or older regardless of tread depth or appearance, as rubber deteriorates over time even when not being used.
Trailer Brake Testing and Maintenance
If you're pulling a trailer, your brakes need regular testing and maintenance to ensure they're working when you need them most. Most trailers use electric brakes that require a brake controller in your tow vehicle to function properly.
Test your trailer brakes monthly by manually activating them with the brake controller while driving at low speeds in a safe area. You should feel the trailer brakes engage and slow the whole trailer. If one side pulls more than the other or the brakes don't engage at all, schedule service immediately.
Annual brake inspection should include removing wheels to check brake shoe thickness, drum condition, and magnet operation. Brake adjustments may be needed if the brake controller requires higher settings to achieve the same braking force. Many RV service centers can perform brake testing and adjustment for $100–200 per axle.
Long-Term Fuel Storage in Motorhomes
Storing a motorhome with fuel presents different challenges depending on storage duration and conditions. For storage periods longer than 30 days, add fuel stabilizer to prevent gas degradation and gum formation that can clog fuel injectors and carburetors.
For storage periods of 3–6 months, keep the fuel tank at least 3/4 full to minimize condensation inside the tank. Add quality fuel stabilizer and run the engine for 10–15 minutes to circulate treated fuel throughout the system. Some owners prefer to drain the fuel system completely for very long storage periods, but this isn't necessary for typical seasonal storage.
In hot climates, fuel degradation happens faster, so consider more frequent fuel cycling or shorter storage intervals. Cold weather storage is generally easier on fuel systems, but you'll still want stabilizer for any storage period longer than a month. Always use fuel stabilizer rated for your storage duration — some products work for 12 months while others extend to 24 months.
Professional vs. DIY RV Maintenance
The decision between professional service and DIY maintenance depends on your skill level, available tools, and the complexity of the task. Some maintenance requires specialized knowledge or equipment that makes professional service the smart choice, while other tasks are well within most owners' capabilities.
Oil changes, fluid checks, and basic inspections are well-suited for DIY maintenance if you have the proper facilities and disposal methods for waste fluids. More complex tasks like transmission service, air conditioning repair, or major electrical work often require specialized tools and knowledge that make professional service worthwhile.
Consider your time, tools, and expertise honestly when deciding what to tackle yourself. A botched DIY repair often costs more to fix than having it done professionally from the start. However, learning basic maintenance skills gives you confidence and can help you handle minor issues on the road.
Budget for professional service on major systems and complex repairs, but don't be afraid to learn basic maintenance tasks that can save money and help you understand your RV better. Many RV maintenance tasks are less complex than they appear once you understand the systems involved.
Building a Maintenance Log You'll Actually Use
A successful RV maintenance program requires organization and consistency. Create a schedule that matches your usage patterns and stick to it, adjusting as needed based on your experience and changing conditions.
Start with manufacturer recommendations for major components, then add items based on your specific RV and usage patterns. A unit that sits unused for months has different maintenance needs than one used every weekend or lived in full-time. Our arrival setup checklist pairs well with a maintenance calendar — pair the two and you'll have both your departure and arrival routines dialed in.
Use a maintenance log to track what's been done and when, including both scheduled maintenance and repairs. This documentation helps with warranty claims and provides valuable information for future owners if you decide to sell. Many RV owners use apps or online services to track maintenance, though a simple notebook works just as well.
Don't let perfect be the enemy of good when it comes to maintenance scheduling. A simple routine that you actually follow beats an elaborate system that gets ignored. Start with basic safety items and expand your routine as you become more comfortable with RV maintenance.
What RV Maintenance Costs, and How to Spend Less
RV maintenance doesn't have to break the bank if you're strategic about it. Learn to do basic tasks yourself, buy quality parts and fluids, and address small issues before they become major problems.
Generic parts and fluids often work just as well as brand-name equivalents at a fraction of the cost. However, don't compromise on safety-critical items like brakes, tires, or propane system components where quality really matters.
Group maintenance tasks together to save time and money. Change multiple fluids during the same service session, inspect all seals during one thorough walk-around, and combine routine maintenance with seasonal preparation tasks.
Consider joining RV clubs or online communities where members share maintenance tips, recommend service providers, and sometimes help each other with repairs. The knowledge and support from experienced RVers can be invaluable for new owners learning the ropes. For a broader look at whether the numbers of full-time or heavy RV use add up for your situation, our cost of full-time RV living breakdown is a useful companion to any maintenance budgeting exercise.
Making RV Maintenance a Habit That Sticks
None of this shows up in the photos you take on the trip. It shows up in the trips that go the way you planned them, which is most of them, once the intervals become routine instead of decisions.
Start with this RV maintenance checklist as your foundation, but adapt it to your specific RV and usage patterns. If you'd rather work from something you can keep in the RV, the free Complete RV Maintenance Guide puts the same intervals into a printable seasonal calendar with a system-by-system troubleshooting section. Some systems will need more attention than others based on age, quality, and how hard you use it. The key is developing consistent habits that catch problems early and keep your RV road-ready.
Remember that maintenance is an investment in your safety, your adventures, and your RV's resale value. Every hour spent on preventive maintenance saves multiple hours of dealing with roadside breakdowns and emergency repairs. Plus, there's something satisfying about knowing your RV is properly maintained and ready for whatever adventure comes next.
Whether you're planning weekend getaways or full-time travel, this maintenance routine will help ensure your RV stays reliable, comfortable, and ready for the road ahead. Now stop reading about maintenance and go check those tire pressures — your next adventure is waiting.
Ready to Take Your RV Maintenance to the Next Level?
If you want more in-depth, easy-to-follow info on how to perform many of these maintenance tasks, we've got you covered. Our Ultimate RV Maintenance Guide includes detailed step-by-step instructions, an easy-to-follow checklist, and a simple calendar with everything laid out for you so you never forget what's due. Submit your email below and we'll send it straight to your inbox!
The guide is printable and designed to keep with you in your RV in case you have a maintenance issue on the road. Download your copy now and take the guesswork out of RV maintenance — because the best adventures happen when your RV is running perfectly.
FAQs
How often should I perform a full RV maintenance inspection?
A full inspection should happen at minimum twice a year — once before your primary travel season begins and once before any extended storage period. On top of that, a quick pre-trip walkthrough covering tires, lights, fluid levels, and hitch connections should happen before every departure. Monthly checks on seals, batteries, and appliances round out a complete maintenance routine that catches most problems before they become expensive.
What is the most important RV maintenance task for preventing expensive repairs?
Roof and seal inspection is the single highest-value maintenance habit you can build. Water intrusion is the leading cause of structural damage in RVs, and it almost always starts with a failed seal that goes unnoticed for months. A $10 tube of appropriate sealant applied at the first sign of cracking can prevent repair bills that run into the thousands, particularly in older RVs where seals have been through years of temperature cycling.
How do I know when my RV tires need to be replaced?
Replace RV tires that are 6 years old or older regardless of tread depth, as UV exposure and temperature cycling cause the rubber compound to degrade internally even when the tire looks fine visually. Visible cracks in the sidewalls, bulges, or uneven wear patterns are immediate replacement signals regardless of age. Most RV manufacturers recommend replacement no later than 10 years from the tire's manufacture date, which is stamped in a four-digit code on the sidewall.
What does winterizing an RV involve and how much does it cost?
Winterizing an RV means removing all water from the fresh water lines, tanks, and water heater, then introducing RV-safe antifreeze into the trap lines and drain points to prevent freezing. The process also typically includes bypassing the water heater to avoid filling it with antifreeze. Professional winterization runs $130–$170 at most RV dealers and service centers, while a DIY winterization can be done for $20–$30 in materials once you know the process. Spring dewinterization costs $75–$200 professionally and is also straightforward to do yourself.
How often should wheel bearings be repacked on a travel trailer?
Wheel bearings on a travel trailer should be repacked every 12 months or every 12,000 miles, whichever comes first. Light users who travel fewer than 3,000 miles a year should still service them annually because the grease breaks down from heat cycling and moisture exposure even during storage. Professional repacking typically costs $150–$250 per axle and is considered routine preventive maintenance rather than an optional upgrade — bearing failure at highway speeds can result in a wheel fire or complete wheel separation.
What is the difference between 30-amp and 50-amp shore power for RVs?
A 30-amp shore power connection delivers a single 120-volt leg at up to 3,600 watts, which is sufficient for most smaller RVs running one air conditioner. A 50-amp connection delivers two separate 120-volt legs for a total of up to 12,000 watts, allowing larger motorhomes and fifth wheels to run multiple air conditioners and high-draw appliances simultaneously. Adapters allow you to connect a 50-amp RV to a 30-amp pedestal or vice versa, but when running a 50-amp RV on 30-amp service, you'll need to manage your power draw carefully to avoid tripping breakers.
How do I prevent mice and rodents from getting into my RV during storage?
The most effective rodent prevention strategy combines physical exclusion with attraction removal. Walk the entire exterior and seal any gap or hole larger than a quarter-inch using steel wool packed into the opening and covered with expanding foam — mice cannot chew through steel wool. Remove all food from the RV interior before storage, including sealed packages and pet food, and clean surfaces thoroughly to eliminate residual food odors. Secondary deterrents like dryer sheets or peppermint-soaked cotton balls can help but should not replace physical sealing.



Categories
Related Posts


Subscribe to the Swervia Newsletter
The best RV stories, tips, and destinations—expertly curated and always free.