RV Plumbing 101: Your RV Has Three Tanks and You Should Probably Know What They Do
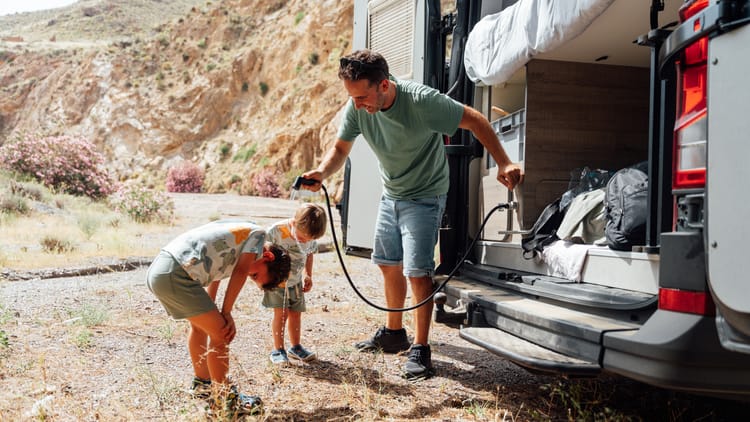
Your RV has running water. Hot showers, a kitchen sink, a flushing toilet, all of it tucked into something you can park at a campsite. That's genuinely impressive, and also slightly mysterious if you've never thought about what's actually happening behind the walls.
Here's the thing: RV plumbing is not complicated. Once you understand the basic flow of water in and water out, everything else clicks into place. Whether you're prepping for your first weekend trip or you've been camping for years and just never peeked under the hood, this is your friendly, no-jargon guide to how RV plumbing works. If you're still figuring out which rig is right for you before any of this matters, our first-time RV buying guide is a good place to start.
The Big Picture: Water In, Water Out
At the highest level, your RV plumbing system does two things: it brings clean water in, and it moves dirty water out. That's it. The details involve three tanks, a pump, a water heater, and a network of lightweight pipes — but the concept is dead simple.
Think of it like a self-contained mini-home. Instead of connecting to a municipal water supply and sewer line 24/7, your RV carries its own water with it and stores waste until you reach a dump station.
The Three Tanks You Need to Know
Your RV plumbing revolves around three holding tanks. Learn these, and you've already passed the midterm.
1. The Fresh Water Tank
This is exactly what it sounds like: a tank that holds clean, potable water for drinking, cooking, showering, and washing. It's typically located under the chassis or inside a storage compartment, and the size varies by RV class. Class A motorhomes often carry 100 gallons or more; smaller trailers and Class B vans might hold 20-40 gallons.
You fill it through a dedicated port on the outside of your rig and when you do, always use a food-grade, potable water hose (usually white or blue, we recommend 50ft). Never use a standard garden hose for your drinking water supply. The plastics used in regular hoses can leach chemicals and leave funky tastes that no amount of campfire ambiance will cancel out.
2. The Gray Water Tank
Gray water is the used water that drains from your sinks and shower. After you wash dishes, rinse off, or brush your teeth, that water flows through a P-trap (just like at home) and collects in the gray tank. The gray tank is typically the largest of the two waste tanks because it collects water from multiple sources throughout the day.
Gray water isn't safe to drink, but it's also not sewage — it's more like soapy, slightly dirty water. That said, most campgrounds and jurisdictions require you to dump it at a proper dump station. Don't just let it drain onto the ground, even at a remote site.
3. The Black Water Tank
This is the toilet tank. Everything that goes down your RV toilet goes into the black water tank. Full stop. It's stored there until you reach a dump station, where you'll connect a dedicated sewer hose (ensure it is a different color from your fresh water hose above) and release the valve.
One pro tip that every veteran RVer knows: always dump your black tank first, then your gray tank. The gray water helps flush out any residue left behind in the sewer hose after the black tank release. It's a small thing that makes the whole process a lot cleaner.
How Water Actually Gets to Your Faucet
So the fresh water is sitting in the tank, so how does it get to the faucet? Two ways, depending on how you're set up.
Option 1: City Water Connection
Most campgrounds offer a water hookup at your site. You connect a hose from the spigot to your RV's city water inlet (it's usually labeled), and boom — you have pressurized water flowing through your rig just like at home. No pump needed. The campground's water system handles the pressure.
One critical accessory for this setup: a water pressure regulator. Campground water pressure can vary wildly, and your RV's plumbing system is designed to handle between 40 and 60 PSI. Too much pressure and you risk damaging fittings or lines. A basic regulator costs around $10-15 and is one of the smartest things you can keep in your hookup kit. Our RV setup checklist covers the full arrival routine so nothing gets missed when you pull into a new site.
One more thing on city water: turn off your water pump when you're hooked up to shore water. With the pump on, it will draw from your fresh water tank instead of using the campground supply, draining your onboard water unnecessarily. The two systems don't mix well, and if your fresh tank runs dry while the pump is running, it'll just cycle on air. Turn the pump off, let the city water do the work, and save your fresh tank for when you actually need it.
Option 2: The Water Pump (Boondocking Mode)
When you're not hooked up to shore water — camping off-grid, staying at a site without hookups, or just parked in a friend's driveway — you draw from your fresh water tank using your RV's 12-volt water pump. The pump is pressure-activated: it kicks on automatically when you open a faucet and shuts off when you close it.
You can usually hear the pump running with its distinctive hum or buzzing sound. Here's an important heads-up: if your water pump is running when nobody has a faucet open, that's a sign of a leak somewhere in your system. Investigate before you lose half your fresh tank to a slow drip.
One thing new RVers sometimes run into: the pump taking a moment to actually get water flowing when you first start up. This is priming. Most RV water pumps are self-priming diaphragm pumps, meaning they're designed to pull air out of the lines and draw water in on their own. But if the water lines were fully drained (after winterizing, for example, or switching from city water to tank water), there can be air in the system that needs to clear first. The fix is simple: open a faucet and let the pump run until steady water comes out. It may sputter and sound like it's struggling briefly, but that's normal. If it runs for several minutes and still produces nothing, check your fresh tank level first (tank gauges can misread) and make sure any winterization bypass valve is in the correct position.
The Pipes Behind the Walls: PEX Tubing and the Basics of RV Plumbing
If you've ever seen the inside of a wall during an RV renovation, you've probably noticed flexible tubing in either red or blue — that's PEX (cross-linked polyethylene) pipe. Most modern RVs use PEX for their water lines instead of copper or rigid PVC.
Why PEX? It's lightweight, flexible, and can handle the vibrations and movement that come with life on the road. It also has some freeze resistance since PEX can expand and contract more than copper, which means a light freeze won't necessarily crack a line the way it would with metal pipe. That said, sustained freezing temperatures are still a problem, which is why winterizing matters (more on that below).
Your RV Water Heater: Hot Water, Anode Rods, and What You Need to Know
Hot water in an RV comes from either a tank-style or tankless water heater, and most run on propane, electricity, or both.
Tank Water Heaters
Traditional RV water heaters store a set amount of hot water, typically 6 or 10 gallons, and keep it warm so it's ready when you need it. The tradeoff is that once the tank runs out, you wait for it to reheat which usually takes about 15 minutes. They run on propane, electric, or a combination. Many RVers with electric hookups prefer to run their water heater on electric to conserve propane, and this type of water heater forces you to take fast showers.
Tankless Water Heaters
Tankless (or on-demand) water heaters heat water as it flows through, meaning you theoretically never run out. They've become increasingly common in newer RVs. The downside is a brief delay before hot water arrives since the unit needs a moment to fire up, and they can be trickier to winterize correctly. If your rig has a tankless heater, follow the manufacturer's winterization instructions closely, since the process differs from a standard tank unit.
The Anode Rod: The Unsung Hero Inside Your Water Heater
If you have a tank-style water heater with a steel tank there's a small metal rod inside that you should know about: the anode rod.
The anode rod is a sacrificial piece of magnesium (or sometimes aluminum) that sits inside your water heater tank. Its entire purpose is to corrode so the tank doesn't. Minerals and electrochemical reactions in the water attack the rod instead of the steel walls of the tank, dramatically extending the life of your water heater. It's a genius little workhorse that most RVers never think about until the tank rusts out and needs a full replacement.
The short version on maintenance: inspect the anode rod at least once a year, typically when you're draining the water heater for winterization. Replace it when it's roughly 50% worn down or the steel core wire is visible.
A few important notes: Atwood/Dometic water heaters have aluminum tanks and do not use anode rods; they have a plastic drain plug instead. Tankless heaters have no tank at all, so no rod needed. If you're not sure what you have, check the label on your unit or pull your owner's manual. And never run your water heater dry. Whether you're on propane or electric, there needs to be water in the tank before firing it up or you risk burning out the heating element.
THE COMPLETE RV MAINTENANCE GUIDE
GET THE FREE 30-PAGE RV MAINTENANCE GUIDE
Tank Sensors: Trust But Verify
Your RV has a monitor panel, usually somewhere near the kitchen or entry, that shows you how full or empty each tank is. It sounds great in theory. In practice, most experienced RVers will tell you that tank sensors, especially for the black tank, are notoriously unreliable. Residue buildup on the sensors can make a half-full tank read as full, or vice versa.
The fix is simple: use the sensors as a general guide, not gospel. Get a feel for how long your tanks last based on your usage patterns, and err on the side of dumping sooner rather than later. Some RVers upgrade to aftermarket monitoring systems like the SeeLevel II, which uses external strip sensors for significantly more accurate readings. If a dead battery is what sent you digging into your RV's systems for the first time, our breakdown of why your RV battery keeps dying is worth reading before your next trip.
Dumping Your Tanks: The Part Nobody Likes to Talk About (But Everyone Needs to Know)
There's a first time for everything, and dumping your tanks at a dump station is a rite of passage that's way less scary once you've done it once.
Wait Until Your Black Tank Is Two-Thirds Full
Here's something counterintuitive that trips up new RVers: you don't want to dump the black tank when it's barely a quarter full. You actually want it at least two-thirds full before pulling the valve. Why? Because the volume of liquid rushing out creates the flow needed to push solids through the hose and out cleanly. Dump too early and you risk leaving waste behind, which builds up over time into a genuinely unpleasant problem.
If you're at the end of a short trip and the tank is only partially full, you can fill it up the rest of the way using water, either by holding down the toilet flush pedal to let water run in, or by pouring water directly from a bucket down the toilet. The goal is enough liquid volume to create real flow when you open the valve. The same logic applies to the black tank valve when you're hooked up at a campsite: always keep it closed until you're ready to dump. Leaving it open continuously lets the liquid drain away while the solids stay behind and dry out. Nobody wants that.
The Basic Dump Station Flow
- Gear up with gloves. This is non-negotiable.
- Connect your sewer hose from your RV's dump outlet to the dump station drain.
- Open the black tank valve first. Let it fully drain, then close it.
- Open the gray tank valve. This helps flush out the sewer hose. Let it drain, then close it.
- Rinse your sewer hose with a dedicated rinse hose, stow everything, and wash your hands like you mean it.
Do You Need a Second Hose to Rinse the Tanks?
Short answer: yes, and you should keep it clearly separate from everything else. Many RVs come equipped with a built-in black tank flush port — a dedicated inlet on the outside of the rig where you attach a non-potable garden hose to spray the inside of the black tank with pressurized water after dumping.
If your rig doesn't have a built-in flush port, you can use a tank rinse wand — a long flexible or rigid wand you insert through the toilet — attached to a garden hose to spray water around the inside of the tank. The Camco Swivel Stik is a popular, well-reviewed option for this purpose.
The key rule in all of this: your black tank flush hose and your tank rinse wand hose should be dedicated to that task and nothing else. Mark them with tape or buy a distinctly colored hose. Never mix them up with your fresh water supply hose. Ever.
For rinsing the gray tank, the good news is you generally don't need a separate wand — the tank gets a natural rinse from all the soapy water running through it every time you shower or do dishes. Dumping your gray tank after the black tank provides that hose flush, and that's usually sufficient.
Which Hose Do You Use to Wash the RV?
Never use your fresh water (potable) hose to wash the exterior of your RV. That hose is for drinking water only. Use a standard garden hose kept separate for external tasks like rinsing the rig, washing the vehicle, or rinsing camping gear. Keeping these clearly separated is one of the simplest hygiene habits in RVing, and one of the most important.
To keep it all straight, here are the three hoses you should have in your kit every single trip:
- Potable water hose (white or blue): For connecting to campground water hookups and filling your fresh water tank. Food-grade only. Never touches anything gross. This is your "drinking water" hose.
- Black tank flush / rinse hose (dedicated, brightly colored or marked): For flushing out the black tank via the flush port or rinse wand after dumping. This hose is for waste system use only and should be stored separately — ideally in its own bag. This is your "poop tank" hose.
- General-purpose garden hose: For washing the exterior of the RV, rinsing gear, or any non-drinking-water task. Never connect this to your fresh water inlet. This is your "everything else" hose.
Should You Leave the Gray Tank Open When Hooked Up?
This one sparks genuine debate in the RV community, but here's the practical breakdown.
When boondocking or camping without hookups, the answer is always no — keep it closed and dump at a proper station. If you want a full picture of the boondocking lifestyle and how water management fits into the off-grid equation, our complete guide to boondocking without hookups covers everything from power to permits.
When you're on a full hookup site with a sewer connection, many experienced RVers do leave the gray tank valve open so they don't have to monitor it constantly, particularly on longer stays. The tradeoff is that if your sewer hose isn't set up with a P-trap bend, campground sewer odors can creep up into your rig through the roof vents. So if your gray tank is open and your rig starts to smell like a sewer, close the gray tank valve.
The one situation where you definitely want the gray valve closed: when you're about to dump the black tank. You need gray water available to flush the sewer hose after the black tank empties. If the gray valve has been open all week and the tank is empty, you've lost that natural rinse. The workaround is simple: close the gray valve a day or two before you plan to dump the black tank, let the gray accumulate, then use it for the post-black-tank flush.
And the black tank? That one is never, under any circumstances, left open while parked. Not even a little bit. Keep it closed until you're actively dumping.
How Much Water Do You Actually Use When Boondocking?
This is one of the most practical questions in all of RV life, and the answer varies more than you'd expect. It depends heavily on how conservative you are, how many people are in the rig, and whether you're taking full showers or quick navy showers.
A reasonable working estimate for a mindful boondocker is around 3 to 5 gallons per person, per day. That covers drinking, cooking, tooth brushing, quick showers, and toilet use. Conservative campers who take short navy showers (wet, soap, rinse) and are thoughtful about not letting the tap run can get it down to 2-3 gallons. Less conservation-minded campers who take longer showers and run the tap freely can easily hit 6-7 gallons or more. etrailer's boondocking water breakdown is worth bookmarking if you want to do the math for your specific tank size.
Showers are almost always the biggest variable. An unregulated RV showerhead runs about 2.5 gallons per minute: take a six-minute shower and you've burned through 15 gallons in one shot. Install a low-flow showerhead and get comfortable with the navy shower method, and you can take a perfectly good shower for under 2 gallons total.
The gray tank often fills faster than the fresh water tank runs out, so keep an eye on both. Most experienced boondockers will tell you that water management — not power or food — is what determines how long they can stay out. For an even deeper look at the full off-grid setup, our guide to building the perfect RV solar setup pairs well with everything covered here, since power and water management go hand in hand when you're camping without hookups.
Winterizing: The Thing That Protects Everything
If you're camping in cold weather or storing your RV over winter, you need to winterize your plumbing system. Water expands when it freezes, and that expansion can crack PEX lines, damage fittings, and destroy your water pump, none of which are cheap or fun repairs.
Winterizing typically involves draining all three tanks, blowing out the water lines with compressed air, and/or running RV antifreeze (pink, non-toxic antifreeze designed specifically for plumbing systems) through the lines until it comes out of every faucet. Your specific RV's manual is the best guide for the exact procedure. Our RV maintenance checklist covers winterization alongside every other seasonal task in one place, which makes it worth bookmarking before the temperatures drop.
A quick note: RV antifreeze is different from automotive antifreeze. The automotive stuff is toxic and absolutely should not go anywhere near your fresh water system. Only use RV-specific pink antifreeze designed for potable water plumbing.
A Few More Tips to Keep Your RV Plumbing Happy
Sanitize your fresh water system at least once a season. A diluted bleach solution run through the lines and tank keeps bacteria from setting up shop. Flush thoroughly and you won't taste a thing.
Never run your water heater dry. Make sure there's water in the system before firing it up. Running it empty can burn out the heating element.
Invest in a water filter inline on your city water connection. It catches debris that can damage your pump and improves taste. A basic inline filter is inexpensive and easy to install. Speaking of keeping your rig in good shape, our guide on RV shore power hookup mistakes is worth reading alongside this one — electrical and plumbing are the two systems that cause the most headaches when set up incorrectly.
A 50-amp RV surge protector is also worth mentioning here: voltage irregularities at campground pedestals can damage sensitive electronics and, in some cases, affect your water pump's control board. It's one of the more invisible protections you can add to your kit.
The Bottom Line on RV Plumbing
Your RV's plumbing system is elegant in its simplicity: fresh water comes in, gets heated and distributed, and used water gets separated and stored until you dump it. The water pump keeps things pressurized off-grid, PEX keeps the system lightweight and road-ready, and three tanks do the heavy lifting of keeping clean and dirty water separate. For the sanitizing intervals, the winterizing procedure and a tank-by-tank troubleshooting chart, download the free Complete RV Maintenance Guide.
Once you understand how it all connects, you'll stop treating your water system like a mystery and start treating it like the reliable road companion it is. Know your tanks, respect the process, keep things maintained, and the water will keep flowing, trip after trip. If you're still getting oriented with your rig overall, our complete RV maintenance checklist and our article on what type of RV you should buy are two of the most useful places to go next.
FAQs
What are the three tanks in an RV?
Every RV has a fresh water tank, a gray water tank, and a black water tank. The fresh water tank holds clean, potable water for drinking, cooking, and bathing. The gray tank collects wastewater from sinks and the shower. The black tank holds waste from the toilet. Each tank is separate, and the fresh water tank is always isolated from the waste tanks.
How does an RV get water pressure without being hooked up?
When not connected to a campground water supply, your RV draws from its fresh water tank using a 12-volt onboard water pump. The pump is pressure-activated, meaning it turns on automatically when you open a faucet and shuts off when you close it. Most RV water pumps operate at around 3 GPM and maintain 40-50 PSI, which is enough for normal use.
How often should you dump your RV's black tank?
Most RVers dump their black tank when it reaches roughly two-thirds full, which provides enough liquid volume to clear solids through the sewer hose cleanly. Depending on usage, this can be every two to four days for full-time RVers or once at the end of a weekend trip. Dumping too early (at 25% or less) can leave solids behind and create buildup over time.
Can you use any garden hose for your RV fresh water supply?
No. You should only use a food-grade, potable water hose — typically white or blue — for connecting to campground water hookups or filling your fresh water tank. Standard garden hoses are made with plastics that can leach chemicals and introduce off-tastes. They are also not rated for contact with drinking water. A dedicated 25- or 50-foot potable water hose is a basic essential for every RV kit.
What is RV antifreeze and is it the same as car antifreeze?
RV antifreeze is a non-toxic, propylene glycol-based product designed specifically for use in potable water plumbing systems. It is safe to flush through your water lines, tanks, and faucets during winterization. Automotive antifreeze — typically ethylene glycol-based — is toxic and must never be used in your fresh water system. RV antifreeze is usually pink and sold specifically for RV or marine plumbing use.
Why is my RV water pump running when no faucet is open?
If your water pump is cycling on when all faucets are closed, it almost always indicates a leak somewhere in the fresh water system. The pump is responding to pressure drop caused by water escaping through a crack, loose fitting, or failed connection. Check all faucets, the water heater connections, and any accessible water lines. A pump that runs continuously without producing water is either running dry (low tank) or has lost prime.
What is the correct order to dump RV tanks at a dump station?
Always dump the black tank first, then the gray tank. The black tank holds toilet waste and needs to be fully cleared before any other tank. The gray tank, which holds soapy water from sinks and the shower, is then released to flush out any residue left in the sewer hose. Reversing this order means your sewer hose rinse is less effective and you may carry over black tank waste.





Categories
Related Posts

Subscribe to the Swervia Newsletter
The best RV stories, tips, and destinations—expertly curated and always free.