How to Build the Perfect RV Solar Setup on Any Budget
Ready to cut the cord and power your adventures with pure sunshine? Let's turn your RV into an off-grid beast that'll keep your coffee maker humming and your devices charged, no matter how far you roam.
Picture this: you're camped beside a pristine alpine lake, no RV parks for 50 miles, and your neighbor's generator just kicked on at 6 AM. Meanwhile, you're sipping coffee while your laptop charges silently from the power you harvested yesterday. That's the solar life, friend – and it's more achievable than you think.
Whether you're a weekend warrior looking to escape hookup fees or a full-timer ready to chase 70-degree weather year-round, a well-designed solar setup is your ticket to true freedom on the road. But here's the thing: building one doesn't require an engineering degree or a trust fund. You just need the right components, a solid plan, and maybe a friend who's good with a drill. If you're still early in the process of figuring out what kind of rig you'll be powering, our guide on what type of RV to buy walks through how different RV classes affect your solar and electrical planning from the start.
How RV Solar Actually Works (The 30-Second Version)
Before we dive into components, let's get crystal clear on how this whole system flows. Think of it like a simple relay race:
Step 1: Solar panels on your roof capture sunlight and convert it to DC electricity
Step 2: That power flows to a charge controller, which regulates the voltage and safely charges your batteries
Step 3: Your battery bank stores this energy for later use (like a gas tank, but for electricity)
Step 4: When you need power, an inverter converts that stored DC power to AC power for your regular appliances
Step 5: Your devices and appliances draw power either directly from the batteries (12V DC stuff) or through the inverter (120V AC stuff)
That's it. Everything else is just sizing these components correctly and connecting them safely. Now let's break down each piece so you can build a system that actually works for your lifestyle.
Solar Panels
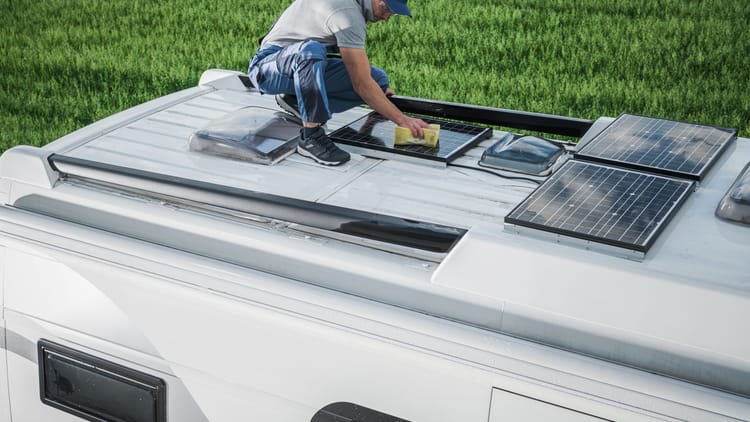
The heart of your system starts on your roof, and choosing the right panels can make or break your off-grid dreams. Modern solar panels have seriously leveled up from those clunky panels your uncle had in the '90s.
Monocrystalline vs. Polycrystalline: The Real Talk
Monocrystalline panels are the Tesla of solar – sleek, efficient, and worth the extra cash. They'll generate more power per square foot, which matters when your roof real estate is limited. Companies like Renogy and Battle Born Batteries have made these surprisingly affordable, with 400-watt panels running around $300-400.
Polycrystalline panels are the reliable Honda Civic option – they'll get the job done for less money, just with slightly lower efficiency. Perfect if you've got plenty of roof space and want to keep costs down—but we recommend trying to fit monocrystalline into your budget somehow.
Flexible vs. Rigid: Choose Your Fighter
Rigid panels are the workhorses – they last 25+ years and handle weather like champs. Mount them on tilting frames from companies like AM Solar and you'll maximize your power generation even when you're not perfectly positioned.
Flexible panels are the stealth option. They sit flush against your roof, won't catch wind like a sail, and weigh about half as much. Perfect for van lifers or anyone who wants to keep their RV's profile low. Just know they typically last 10-15 years instead of 25.
Portable Panels: The Best of Both Worlds
Don't want to commit to permanent roof installation? Portable solar panels give you maximum flexibility. Foldable units from Jackery, EcoFlow, Renogy, and BigBlue typically range from 100-400 watts and can be positioned for optimal sun exposure while you stay parked in the shade. Most popular models come with built-in kickstands and charge controllers. You'll get better performance than roof-mounted panels since you can adjust them throughout the day, plus they're perfect for extending your off-grid time when your RV's parked under trees. The trade-off? You'll need to set them up and take them down each time, and they require storage space inside your rig. A portable solar generator with a 200W panel is one of the cleanest entry points for RVers who want real off-grid capability without committing to a full roof installation.
How Much Solar Do You Need? (Spoiler: Probably Less Than You Think)
Most people either massively overestimate or dangerously underestimate their power needs. A typical weekend warrior setup with 400-800 watts of panels covers basic needs, while serious boondockers might need 1,200+ watts.
The key is calculating your actual daily power consumption first, then sizing your solar array to replace that energy. But here's where it gets tricky – you need to account for weather, season, panel angle, and how many margaritas you had when parking your rig. For a complete look at how solar sizing fits into the broader financial picture of off-grid travel, our breakdown of the real cost of full-time RV living is worth reading before you spec out your system.
Charge Controller
Think of your charge controller as the bouncer at the battery club – it decides what gets in and keeps the troublemakers out. This little box prevents your expensive battery bank from getting fried by overzealous solar panels.
MPPT vs. PWM: The Efficiency Showdown
PWM (Pulse Width Modulation) controllers are like using a hammer when you need a scalpel – they work, but they waste energy. They're cheaper upfront but cost you power every single day.
MPPT (Maximum Power Point Tracking) controllers squeeze every available watt from your panels, especially in less-than-perfect conditions. They cost 2-3x more than PWM but typically increase your power harvest by 20-30%. When you're relying on solar for everything from your morning coffee to your internet connection, that efficiency matters. And if connectivity is a priority alongside power, our guide to the best RV internet for remote work covers how to keep your setup truly self-sufficient off-grid.
Victron SmartSolar and other controllers connect to your phone via Bluetooth so you can monitor performance and adjust settings without crawling around your battery compartment. The 100/30 model (100V input, 30A output) handles most RV setups perfectly for around $200.
Sizing Made Simple
Take your total panel wattage, divide by your battery bank voltage, then add 25% headroom. Four 400W panels on a 12V system? That's 1,600W ÷ 12V = 133A, so you'd want at least a 165A controller. Or wire your panels in series for 24V or 48V input to use a smaller, cheaper controller.
NOT SURE HOW MUCH SOLAR YOU ACTUALLY NEED?
GET OUR FREE 42-PAGE GUIDE THAT SIZES YOUR RV SOLAR SYSTEM FOR YOU
Inverter
Your inverter is the translator between your 12V battery bank and the 120V world we live in. Choose wrong here, and you'll either waste money or find yourself unable to run that Instant Pot when you need your comfort food most.
Pure Sine Wave or Modified: Don't Cheap Out
Pure sine wave inverters cost more upfront but they're worth every penny. They'll run sensitive electronics without that annoying buzzing sound, and they won't damage your gear over time. Modified sine wave inverters are like buying cheap gas – you'll save money today but pay for it later.
Many inverters will outlast your RV, and some combine inverter and charger in one unit – pure genius for space-conscious builds. Expect to spend $600-1,200 for a quality 2,000-3,000 watt unit. A 3,000W pure sine wave inverter handles nearly everything in a well-equipped RV — from coffee makers to laptops to CPAP machines — without the compatibility issues that plague modified sine wave units.
Sizing Your Inverter: Bigger Isn't Always Better
Size your inverter for your largest simultaneous load, not your total daily consumption. Running a microwave (1,200W) and coffee maker (1,000W) at the same time? You need at least 2,500 watts to handle the startup surge. But if you're disciplined about not running everything at once, a 1,500-watt inverter might suffice and will be more efficient during light loads.
Pro tip from the road warriors: Install a smaller inverter (300-600W) for always-on loads like phone chargers and laptops, then use your big inverter only when needed. Your batteries will thank you.
Wiring Diagram
Here's where theoretical knowledge meets real-world execution. A solid wiring plan prevents fires, maximizes efficiency, and keeps you from pulling your hair out during installation.
The Basic Flow: Sun to Stuff
Your power flows exactly like we described at the beginning: Solar panels → Charge controller → Battery bank → Inverter → Your devices. Each connection point needs proper fusing, correctly sized wire, and weatherproof connections. A battery monitor installed at your battery bank gives you real-time visibility into state of charge, voltage, and draw — information that's critical when you're managing a solar system without hookups.
Wire Sizing: Don't Let Physics Beat You
Undersized wire wastes energy as heat and can start fires. Use this rule: For 12V systems, you need 4 AWG wire for runs over 10 feet carrying 100+ amps. For your DC loads, 10 AWG handles most 12V appliances under 30 amps.
Always install fuses or breakers within 7 inches of your battery positive terminal. A Class T fuse rated for your maximum system amperage will protect your entire investment. Electrical safety at your shore power connection matters too — our guide to RV shore power hookup mistakes is worth reading alongside this one, since hybrid solar and shore power setups require you to get both sides right.
Grounding: The Boring Stuff That Keeps You Alive
Ground everything to your RV's chassis – solar panels, charge controller, inverter, and battery bank negative. Use at least 10 AWG wire for all grounds and make sure connections are tight and corrosion-free. Your life literally depends on this working correctly.
Electrical issues are also one of the more common triggers for a dead battery bank. If you've ever come back to an RV that won't start or a system that won't hold a charge, our breakdown of why your RV battery keeps dying covers the most common culprits and how to prevent them.
Setups in Action
Learning from others' successes (and mistakes) beats reinventing the wheel. Here are some real-world examples that prove solar isn't just for the trust-fund crowd.
The Weekend Warrior Setup: @joefelz
@joefelz Replying to @Bradley Pattison bro, mee the perfect “weekend warrior” set up 🚐☀️🔋 #joefelz ♬ Trapped Alone Trap Hip Hop Serious - Marscott
The Full-Timer's Dream: @interstateingrams
@interstateingrams How our RV Solar setup works. ♬ original sound - Hugh & Courtney | Full-time RV
The Van Life Approach: @explorist.life
Installation Reality Check
Whether you're installing traditional or flexible solar panels on an RV roof, proper installation guides help achieve a seamless setup for life on the road. The key is taking your time with measurements, using quality sealants like Dicor, and not rushing the electrical connections.
Most DIY installations take a weekend for basic setups, longer for complex systems with battery monitoring and remote controls. Budget for extra time and have a multimeter handy – you'll use it more than you think. If solar is going on your list alongside other rig upgrades, our RV maintenance checklist helps you prioritize what to tackle first so nothing critical gets pushed to the back burner.
For RVers planning to spend serious time off-grid, a solid solar setup pairs naturally with a reliable water filtration system. Our guide to portable water filter systems for RVs covers the options that work when you're miles from the nearest hookup — a natural companion to everything you've just read. And if boondocking is the goal, our complete guide to boondocking without hookups covers the full picture of what it takes to go fully self-sufficient. A 100Ah 12V lithium battery is one of the most impactful single purchases you can make for extending your off-grid time — lithium holds a usable charge longer and tolerates deeper discharge cycles than AGM without degrading.
FAQs
How many solar panels do I need for an RV?
For a basic weekend setup powering lights, phone charging, and a fan, 400 watts of solar is a solid starting point. Full-timers running a refrigerator, laptop, and other appliances typically need 800 to 1,200 watts or more. The most accurate way to size your system is to add up your daily watt-hour consumption across all devices, then calculate how many panel watts you need to replenish that by early afternoon. Always build in a 20-30% buffer for cloudy days and less-than-ideal panel angles.
What type of battery is best for an RV solar setup?
Lithium iron phosphate (LiFePO4) batteries are the current standard for RV solar systems. They're lighter than AGM, tolerate deeper discharges (down to about 20% state of charge versus 50% for AGM), and have a significantly longer lifespan — typically 3,000 to 5,000 charge cycles compared to 400 to 600 for AGM. The upfront cost is higher, but the cost-per-cycle math strongly favors lithium for anyone who uses their system regularly. A 100Ah lithium battery provides roughly 1.2 kWh of usable energy on a 12V system.
What is an MPPT charge controller and do I need one?
An MPPT (Maximum Power Point Tracking) charge controller dynamically adjusts the electrical operating point of your solar panels to extract the maximum available power at any given moment. Compared to a PWM (Pulse Width Modulation) controller, MPPT units typically increase energy harvest by 20 to 30%, particularly in cold weather or partial shade. For any system over 200 watts, an MPPT controller is worth the additional cost. Most quality units connect via Bluetooth and allow you to monitor your system from a phone app.
Can I run an air conditioner on solar?
A standard RV rooftop air conditioner draws 1,200 to 1,800 watts at startup and 600 to 900 watts running. That's possible on solar, but it requires a large battery bank (at minimum 200-300Ah of lithium capacity) and enough panel wattage to replenish what the AC draws before nightfall. Most weekend-scale systems can't sustain continuous AC use off-grid. A more practical approach is to use the AC while connected to shore power or a generator, and rely on a quality roof vent and battery-powered fan for temperature management when boondocking.
What is a pure sine wave inverter and why does it matter?
A pure sine wave inverter produces AC power that closely mimics what comes from a standard wall outlet — smooth, consistent, and compatible with all devices including sensitive electronics like CPAP machines, variable-speed motors, and modern appliances. A modified sine wave inverter produces a stepped approximation that works for basic resistive loads but can cause humming, overheating, or outright damage in sensitive gear over time. For any RV solar system that powers electronics regularly, pure sine wave is the correct choice.
How long does it take to install a solar system on an RV?
A basic portable or plug-and-play system can be set up in a few hours with no permanent installation required. A properly wired roof-mounted system with a battery bank and inverter typically takes one to two weekends for a competent DIYer — longer if you're adding battery monitoring, shore power integration, or a dedicated inverter/charger. Planning your wire runs, fusing, and grounding before you start cutting holes is the single biggest time-saver. Budget extra time and don't rush the electrical connections.
How do I know if my RV solar system is working correctly?
A battery monitor showing state of charge, voltage, and current draw is the most reliable way to assess system health at a glance. On a sunny day with a fully charged bank, your charge controller should show near-zero input current and the battery voltage should be stable at or near absorption voltage (around 14.4V for a 12V lithium system). If your batteries aren't reaching full charge by midday in good sun, check for shading on the panels, a loose connection, or a controller that's undersized for your panel array.