Winterizing an RV With Compressed Air: How Much Pressure, and What Air Alone Won't Do
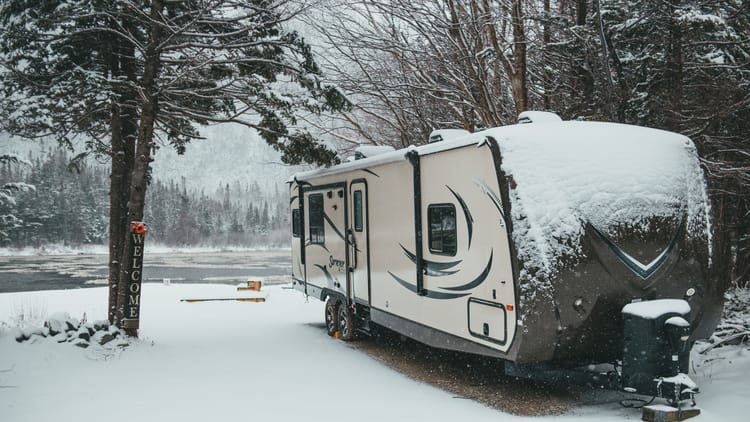
The first sign you forgot to winterize your RV probably won't come until spring.
You turn on the water pump. It runs. And runs. And runs. No water.
Then you notice the puddle.
Somewhere in the RV, a fitting has split because water froze inside it months ago. RV plumbing doesn't take much convincing: the pipes are often thin plastic tubing tucked through floors and walls, and when water freezes and expands, the fittings are usually the first things to surrender.
Winterizing is really just making sure that water isn't sitting in those lines when the temperature drops.
There are two common ways to do it. You can pump non-toxic RV antifreeze through the plumbing until pink comes out of every faucet, or you can use compressed air to blow the water out and leave the lines dry. This guide is about the second method.
Blowing out the lines is fast, inexpensive, and means you don't spend half of spring flushing pink antifreeze out of your drinking water system. Once you've bought the little adapter you need, it costs practically nothing to do again.
But there's a catch, and it's the one that gets a lot of first-time winterizers.
Compressed air takes care of the water in your plumbing lines. It doesn't magically empty the water sitting in your drains. Your sink's P-trap, for example, is supposed to hold a little water. Leave that water there all winter and it can freeze, expand, and crack the trap.
So even if you're blowing out the plumbing, you'll still want a little RV antifreeze for the drains.
One other thing to settle before you start: is your RV actually going to be stored for the winter?
Because once it's winterized, that's it. No running water. No shower. No flushing the toilet. No grabbing a glass from the faucet before heading out.
If you've got a February camping trip on the calendar, don't winterize this way yet. Our winter rv camping prep guide is the better place to start.
What Compressed Air Does to Your Water Lines, and What It Leaves Behind
Your RV has two separate water systems, and this all makes more sense once you can tell them apart. The fresh side brings clean water to your faucets under pressure, either from your water pump or from the campground hookup. The waste side carries it away afterwards, with no pressure at all. Just gravity and a bit of slope.
Compressed air only ever touches the fresh side. You screw a fitting into the city water inlet on the outside of your RV, the same connection you'd attach a hose to at a campground, and air goes in and follows the path pressurized water takes. The supply lines, the runs going up to each faucet, the water heater once you've drained it.
It doesn't reach every last inch, though. Most RV water pumps have a check valve built in, which is what keeps city water from running backwards into your fresh tank, and it stops air going that way too. So the fresh tank and the plumbing between the tank and the pump are a separate job, and your manual will say how yours wants it handled.
Everything the air does reach, it leaves through whichever faucet you've opened. That's the end of its trip. It doesn't keep going down the drain.
Which is where the P-trap comes in. Look under any sink and you'll see the pipe bend into a U before it disappears into the floor. That U holds a little water at all times, on purpose. It's a seal, and without it you'd smell your black tank every time you walked into the kitchen. Air blown in the front of your RV never reaches it. Not at 30 PSI, not at 100.
So the air-versus-antifreeze argument you'll run into isn't really an argument. Both sides are describing half of the same RV. Our rv plumbing primer walks through the three tanks if the two halves still blur together.
The Air Source: What Pressure, and Why 30 PSI Is the Number
Set your regulator to 30 PSI. Treat 40 as the hard ceiling, and check your owner's manual, because your RV's builder published a number for your coach and that's the one that wins.
The temptation is to turn it up. More pressure, faster job, right? Not really. Pushing a standing column of water through a long, twisting run of tubing is about how much air you can move, not how hard you push it. Past a certain point the extra pressure stops helping the water along and starts looking for the weakest thing in the line. Never the tubing. A crimp ring, a faucet cartridge, the little check valve inside the pump. Cheap parts in awkward places.
Which is also why you don't need a serious compressor. What you want is one that can keep air moving, not one that hits a big number on the gauge, and a small pancake compressor of the kind that lives under a workbench and inflates bike tires is usually plenty. The tank gives you a reserve while you walk to the back bathroom, but the reserve isn't what's doing the work. A portable air compressor that fits in a storage bay handles this and your tire pressure both. Be skeptical of the little plug-in inflators, though. One of those can show you 30 on the gauge all afternoon without moving enough air to shift water out of a line.
If you buy one thing off this page, make it a blow-out adapter. It's a small brass fitting that threads into your city water inlet and gives the compressor hose somewhere to connect. That's the whole thing, and without it none of the rest of this happens. Add a pressure regulator and 30 PSI becomes a setting instead of a guess about where the needle was sitting.
The Order to Work In, Because the Water Heater Is Unforgiving
Anyone can screw on a fitting. The order is where people lose money, and the water heater is usually where it happens. Two things are going on inside that tank. The first is several gallons of water sitting at close to scalding, and you're about to open a drain valve on it. The second is the electric heating element, which will happily keep glowing in an empty tank until it burns itself out. Both are one switch away, which is why the heater goes first.
- Turn the water heater off, propane and electric, and let it cool. Cool to the touch, then keep going. Skip it and a Saturday chore turns into a parts order.
- Drain the heater, then bypass it. In that order. Bypassing a full tank just seals in the water you came to get rid of, and that tank holds more than anything else in your RV. No factory bypass valves? A water-heater bypass kit is an afternoon's work and you'll be glad of it every fall after this one.
- Pull the water filter cartridge out of its housing. It's soaked, it will freeze, and it comes out of storage as a ruined cartridge in a cracked housing. Toss a replacement water filter in the spring bin while you're thinking about it.
- Open the low-point drains and every faucet. Those are the pipe ends that stick down through the floor at the lowest spot in your plumbing, usually a pair, one for the hot side and one for the cold. Gravity does this part for free and takes most of the water with it before your compressor does anything.
- Close things back up, connect the adapter, set the regulator. Air takes the easiest way out, so an open low-point drain is where most of it will go. Some procedures keep one open on purpose at this stage, so if your manual says otherwise, follow your manual.
- Work fixture by fixture until only air comes out. Then go back and do the far ones again.
Gravity before machinery. Learn why each step sits where it does and you'll never need the list again.
Subscribe to our weekly newsletter.
EVERYTHING YOU NEED TO GET YOUR RV THROUGH WINTER. FREE, EVERY WEDNESDAY.
How to Blow Out Camper Water Lines Fixture by Fixture, Including the Ones People Forget
The compressor is hooked up now and the plumbing is holding air. From here you work one fixture at a time, and it really is one at a time. Open three faucets at once and the air takes the easiest route out, clears that line beautifully, and gives the other two a gentle breeze.
Hot and cold are separate runs, so everything gets done twice. Kitchen sink, both. Bath sink, both. Shower, both. Hold each one open until the sputtering stops and the air comes out steady and dry, then count to ten and keep holding, because a long run of line in a big coach holds more water than the noise suggests.
Then there's the list nobody counts, which is where the cracking usually happens:
- The shower wand. Hold it up over your head and run it clear, or you've left a coiled hose full of water all winter.
- The toilet valve, and the little sprayer beside it. That sprayer is its own dead-end run and it gets forgotten almost every time.
- The outside shower, hot and cold, behind the little door you open twice a summer.
- The washing machine inlets and the ice maker line, if you have them. Dead ends with no reason on earth to drain themselves.
- The second bathroom, missed reliably by people who just cleared "the bathroom."
- The city water inlet, which keeps a little water in its check valve after you unscrew the hose.
Then walk the coach one more time. The far fixtures always give up more on a second pass, and it takes about four minutes.
The Step Almost Everyone Skips
Your supply lines are empty now. The traps under your drains are not, and no amount of standing there with a compressor is going to change that. Blowing out the fresh water side doesn't winterize a drain trap. So the last part of this job is a jug of pink.
Pour non-toxic RV antifreeze down the kitchen drain, the bathroom sink, the shower, the tub, the pan if you have a wet bath. Enough to fill the bend, which is what's recommended for any plumbing left unheated through a freeze, house or RV. You either get at the trap and empty it or you fill it with antifreeze, and in an RV you can't get at it, so you fill it. Add a little to the toilet as well, to protect the seal at the bottom of the bowl, because that gasket costs almost nothing and is a genuinely miserable afternoon to replace.
This isn't an optional extra. It's the second half of the job, and skipping it is how somebody with a textbook blow-out still finds a split trap in April.
And one rule that doesn't bend: non-toxic RV antifreeze only, never the automotive kind. Automotive antifreeze is ethylene glycol, which the CDC's toxic substances registry describes as odorless with a sweet taste, and swallowing a meaningful amount of it causes serious illness or death. Sweet, and lethal to a dog that finds a puddle of it on a driveway. It has no business anywhere near a system people drink from.
When Compressed Air Is the Wrong Call
Plenty of people should skip all of this. No compressor, no adapter, no interest in owning either? Then don't. Pumping antifreeze through protects exactly the same plumbing, needs nothing but a jug and a siphon hose, and it's the method most owner's manuals print.
Our guide to how to winterize an rv runs that version start to finish. And if you're towing, how to winterize a travel trailer covers the tank layout and the quirks of a box sitting on its jacks all winter.
Air for the Lines, Antifreeze for the Traps
Two systems, two tools. Air empties the pipes that feed your faucets, antifreeze protects the bends that air can't reach, and the water heater goes first because it's hot and it's holding more water than anything else in there.
The reason to get it right isn't really the repair bill, though a split fitting behind a wall panel is a bad day by any measure. It's that April comes around, de-winterizing takes twenty minutes and a hose, and you're pulling out of the driveway while somebody else waits on a service appointment.
All this assumes the RV is going away for the season. If you'd rather keep using it, rving in cold weather is a different setup, built around a heated hose and a tank you keep from freezing rather than one you empty.
Fold the run into your rv maintenance routine. If the RV winters somewhere other than your own driveway, our rv storage guide covers what to ask a lot before you leave it. And in the spring, the rv setup checklist picks up where this leaves off.
FAQs
Can you just blow out the lines instead of using antifreeze?
Not quite. Compressed air clears your pressurized plumbing: the supply lines, the runs going up to each faucet, and the water heater once you've drained it. It can't clear a P-trap, because a trap is built to hold a little water as an odor seal, and air fed in at the city water inlet leaves through the faucet rather than heading down the drain. It also won't necessarily reach your fresh tank or the plumbing between tank and pump, since most RV pumps have a check valve in the way. So use both. Air for the lines, a pour of non-toxic RV antifreeze in every drain and the toilet.
How much PSI do you need to blow out RV water lines?
Set your regulator to 30 PSI and treat 40 as a hard ceiling, then check your owner's manual, because your RV's builder published a number for your coach. Getting water out of a line is about how much air you can keep moving, not how hard you push it, so pressure past that range doesn't help and does put strain on crimp rings, faucet cartridges and the check valve inside the pump. Those are the parts that fail, not the tubing.
Do you still need antifreeze in the drains after blowing out the lines?
Yes. A P-trap is designed to hold water, and no amount of air pushed through the fresh water side will empty one. Pour non-toxic RV antifreeze into every sink, shower and tub drain until the bend is full, and add a little to the toilet to protect the seal at the bottom of the bowl. Never use automotive antifreeze. That's ethylene glycol, it tastes sweet, and swallowing a meaningful amount of it can be fatal to a person or a dog.
What order do you winterize an RV with compressed air in?
Water heater off, propane and electric both, and left until it's cool to the touch. Drain it, then bypass it. Pull the water filter cartridge. Open the low-point drains and faucets and let gravity take what it can. Then connect the adapter, set the regulator, and work fixture by fixture until only air comes out. The heater goes first because it's hot and holds more water than anything else in the RV. Whether the low points stay open during the blow-out varies between procedures, so follow your manual there.
Which RV fixtures get missed when blowing out water lines?
The outside shower, the toilet sprayer, the shower wand, the washing machine inlets and the ice maker line, a second bathroom, and the city water inlet itself. Every one of those is a dead-end run with no reason to drain on its own. Work the hot and cold sides separately at each fixture, then walk the whole coach a second time, because the far runs give up more than you'd expect on the second pass.
Is a small air compressor enough to winterize an RV?
For most coaches, yes. What matters is how much air the compressor can keep moving, not how high a number it can reach on the gauge, and a small pancake compressor manages plenty. The tank gives you a reserve while you walk between fixtures, but the reserve isn't what's doing the work. Be more skeptical of the little plug-in inflators, which can show you 30 PSI without moving enough air to shift water out of a line.





Categories
Related Posts

Subscribe to the Swervia Newsletter
The best RV stories, tips, and destinations—expertly curated and always free.